7 Tips for Choosing the Right Dismantling Joint?
Selecting the right dismantling joint is a practical decision, not a catalogue exercise. It affects installation time, maintenance access, pipeline alignment, and long-term sealing performance. On a busy water-treatment site, even a few millimetres of poor adjustment can complicate flange connection. That detail is easy to overlook.
Pipeline engineer David Butler often reminds project teams, “A reliable joint must make future maintenance easier, not merely complete today’s installation.” This principle captures the real purpose of a dismantling joint. It should provide controlled axial adjustment, dependable restraint, and safe disassembly when valves, pumps, or meters require replacement. The correct design also needs to match the pipe material, pressure class, flange standard, temperature range, and surrounding soil conditions.
Small choices matter. A coated steel joint may suit one installation. A ductile iron or stainless-steel option may serve another. Bolt quality matters too. So does gasket compatibility. A joint that looks robust may still fail when its movement range is insufficient. That is an uncomfortable possibility, but it deserves honest attention.
The seven tips in this guide focus on field-based selection rather than marketing claims. They examine pressure ratings, materials, tolerances, corrosion protection, installation space, and maintenance demands. They also encourage careful review of drawings and manufacturer data. Specifications can be incomplete. Human assumptions can be worse.
Experience helps. Verification matters more. By comparing the dismantling joint with actual operating conditions, engineers and contractors can reduce installation delays and prevent avoidable leakage. The best choice is rarely the cheapest component. It is the one that remains accessible, compatible, and dependable years after commissioning.
What Is a Dismantling Joint and Why Does Selection Matter?
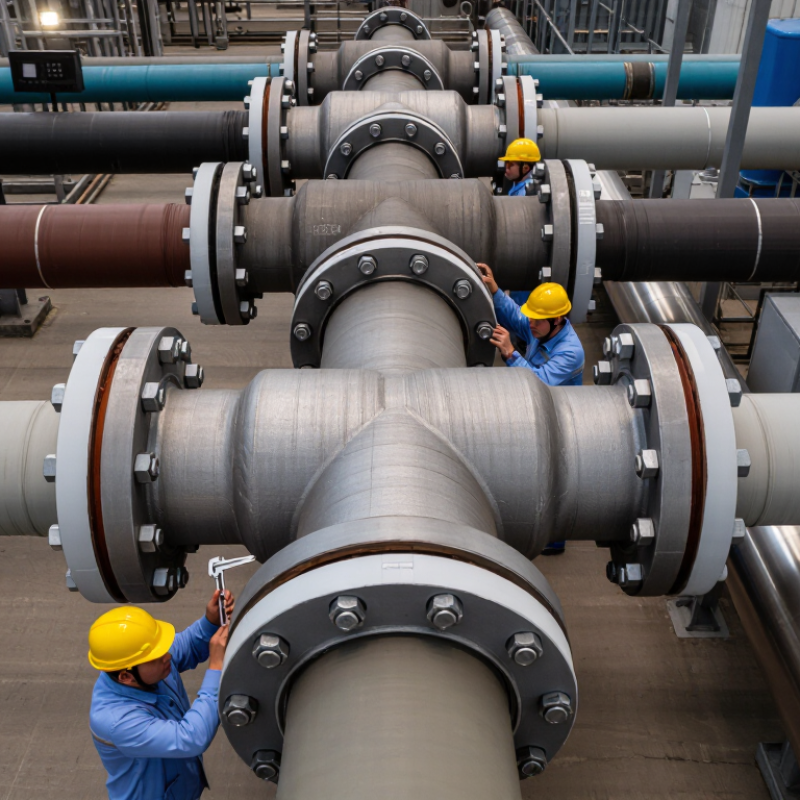
A dismantling joint is a mechanical pipe fitting that allows controlled movement between connected sections. It helps installers remove valves, pumps, and other equipment without cutting the pipeline. This access can save hours during maintenance. Selection matters because the wrong joint may leak, shift under pressure, or create difficult repair conditions. In field inspections, small alignment errors often become expensive problems. I have also seen specifications that looked complete but ignored actual site movement.
Tip 1: Check pipe diameter and flange dimensions carefully. A few millimeters can affect sealing.
Tip 2: Confirm the pressure, temperature, and fluid conditions.
Tip 3: Choose materials that match the pipe and operating environment.
Tip 4: Review the expected axial movement. The joint must provide enough adjustment without losing stability.
Tip 5: Examine tie rods, bolts, gaskets, and coatings as one system. Weak accessories can undermine a strong body.
Tip 6: Consider installation space around the valve or pump. A joint may fit on paper but remain impossible to assemble.
Tip 7: Verify testing requirements and maintenance access before approval. Ask for dimensional drawings and clear installation instructions. Do not rely on appearance alone. A heavier joint is not automatically better. My own preference has changed after observing corrosion beneath apparently sound coatings. Site records, inspection history, and qualified engineering review should guide the final choice.
How to Evaluate Pressure, Temperature, and Material Compatibility
7 Tips for Choosing the Right Dismantling Joint
Pressure, temperature, and material compatibility should guide every dismantling joint selection. Never choose by nominal diameter alone. Check the pipeline’s design pressure, test pressure, operating temperature, and flange rating together. ASME B16.5 pressure-temperature tables show that allowable pressure can decrease as temperature rises. This detail is often overlooked.
Confirm the joint’s axial restraint and tie-rod capacity. Internal pressure creates thrust at every disconnected section. A joint may fit perfectly but still fail under hydraulic loading. Review test certificates, dimensional drawings, and applicable EN or ASME requirements. During inspections, look for damaged threads, uneven gaps, and gasket compression. Small installation errors can become serious leakage paths.
Material compatibility needs equal attention. Compare the joint body, bolts, coating, and gasket with the fluid, pH, chloride level, and temperature. The NACE IMPACT study estimated global corrosion costs at about 2.5 trillion dollars annually, equal to roughly 3.4% of global GDP. That figure makes material selection more than a maintenance concern. Stainless steel may resist some chemicals, but it can still suffer chloride stress corrosion. Rubber gaskets also lose elasticity under heat, ozone, or incompatible fluids. I once treated temperature as a secondary detail. That was a poor assumption. Check the actual medium, not only the pipe material. Ask for compatibility evidence when operating conditions are uncertain.
How to Compare Adjustability, Installation, and Maintenance Features
Choosing the right dismantling joint starts with adjustability, not appearance. Check the permitted installation gap against the pipeline drawing. A wider adjustment range can simplify valve removal and future repairs. However, excessive movement may increase alignment risks. Review flange size, pressure rating, temperature limits, and material compatibility before ordering. Ask for test data and clear dimensional tolerances. Small details matter.
During installation, confirm that the joint matches the pipe’s actual position. Do not force a poor alignment with uneven bolt tightening. Use the specified gasket, support heavy valves, and tighten bolts in a controlled cross pattern. Record torque values. In field inspections, I have seen leakage begin beside one under-tightened bolt. The problem looked minor. It was not.
Maintenance features deserve equal attention. Choose accessible tie rods, corrosion-resistant surfaces, and replaceable sealing components. Leave enough clearance for a wrench and inspection camera. Check bolts, flanges, coating damage, and seepage during scheduled shutdowns. A joint that is adjustable but difficult to inspect may create future labor costs. I once underestimated access space on a crowded line. That mistake delayed maintenance. Compare the installation time, adjustment method, spare-part availability, and inspection requirements before making the final selection.
How to Verify Standards, Quality, and Supplier Reliability
7 Tips for Choosing the Right Dismantling Joint
How to Verify Standards, Quality, and Supplier Reliability
A dismantling joint must match the pipe material, pressure class, flange drilling, and installation environment. Check whether the product follows ISO 2531, EN 14525, or AWWA C219, where applicable. Do not accept a standard number alone. Ask for the exact edition, scope, and test requirements. The joint should also show rated pressure, temperature limits, coating details, and gasket material. Small details matter.
Request material certificates, dimensional inspection records, and pressure-test reports for the actual production batch. Look for traceable heat numbers on flanges, sleeves, bolts, and restrained components. Independent laboratory testing is useful, but factory records still reveal daily control. ISO’s Survey 2022 recorded 1,265,216 ISO 9001 certificates worldwide. This figure shows broad adoption, not automatic product quality. A certified management system cannot replace product evidence.
Supplier reliability needs practical verification. Review references from comparable water, wastewater, or industrial pipeline projects. Ask how nonconforming parts are handled, documented, and replaced. Visit the factory if project value allows it. Check machining accuracy, coating thickness, gasket storage, and bolt protection. I once treated a polished certificate package as sufficient evidence; that was too optimistic. A missing inspection plan can create more risk than a visible surface defect. Require clear drawings, installation instructions, warranty terms, and responsive technical support before approving the joint.