shining bright

a British lighting manufacturer with a difference

Obsessed with solving problems, not just selling 'stuff': we were born from a belief that the lighting industry deserved better.

10 Tips for Choosing a Solar Power System for RV

Choosing a Solar Power System For Rv is no longer a niche upgrade. It is a practical energy decision for campers seeking quieter nights, reliable refrigeration, and fewer campground hookups. The RV Industry Association reported approximately 11 million U.S. households owned an RV in 2021, creating a substantial market for mobile power solutions. Meanwhile, the International Energy Agency’s Renewables 2024 report identifies solar photovoltaic power as the world’s fastest-growing renewable technology.

Real-world selection requires more than counting rooftop panels. You must match daily watt-hours, battery chemistry, inverter capacity, roof space, shade exposure, and driving habits. A 200-watt array may support lights and device charging. It may struggle with an induction cooker, compressor refrigerator, or air conditioner. The details matter. Very much.

RV electrical specialist John Wiles has emphasized, “The battery is the heart of any stand-alone PV system.” That principle guides this article’s ten practical tips. We will examine energy audits, panel placement, lithium versus lead-acid batteries, charge controllers, wiring losses, installation safety, and seasonal performance. The U.S. Department of Energy’s Energy Saver resources also stress that system output depends on sunlight, orientation, and equipment efficiency.

One uncomfortable truth remains: advertised capacity rarely equals usable energy. I have seen buyers focus on panel wattage while overlooking battery reserve and cloudy-weather demands. That mistake is easy to repeat. Careful planning is less exciting, but more dependable. These recommendations aim to make your Solar Power System For Rv safer, more efficient, and better suited to the journeys you actually take.
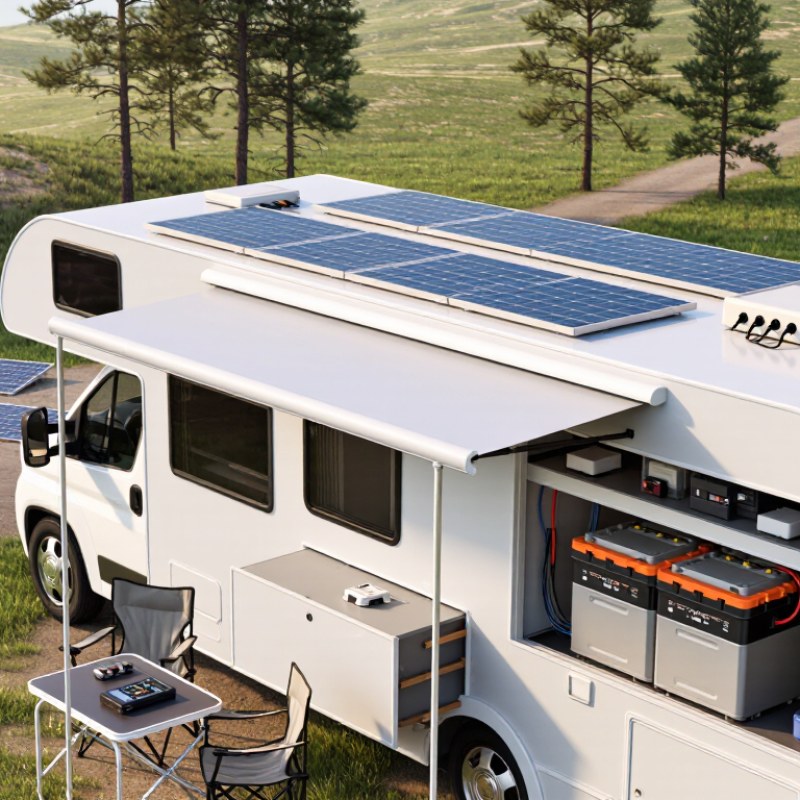
10 Tips for Choosing a Solar Power System for RV

Assessing Your RV’s Energy Needs and Travel Habits

10 Tips for Choosing a Solar Power System for RV

Assessing Your RV’s Energy Needs and Travel Habits

Your travel routine matters more than a large panel count. The 2024 North American Camping Report recorded 57.8 million camping households in the United States during 2023. Many campers now combine remote stays with occasional campground hookups, creating very different power requirements. A weekend traveler may need lighting, phone charging, and a water pump. A remote worker may also run a laptop, router, refrigerator, and ventilation fan daily.

Write down each appliance, its wattage, and daily operating hours. For example, a 60-watt refrigerator running eight hours uses about 480 watt-hours. Add lighting, charging, heating controls, and inverter losses. The National Renewable Energy Laboratory’s PVWatts guidance shows that solar output changes with location, season, orientation, and shading. Tree cover at a campsite can reduce production sharply. It is easy to overestimate.

Keep a margin. My first estimate was too optimistic. A 1,000-watt-hour daily load may require roughly 1,300 watt-hours from the array after charging and conversion losses. Battery capacity should also reflect cloudy days, not only sunny afternoons. Check whether your trips include winter travel, long driving days, or several nights without hookups. The U.S. Energy Information Administration reports substantial seasonal variation in solar availability across regions, so one universal system size is unreliable. Measure real usage with a monitoring device for several trips, then adjust the system around evidence rather than guesswork.


10 Tips for Choosing a Solar Power System for an RV

Assessing Your RV’s Energy Needs and Travel Habits

This example estimates typical daily electricity use during off-grid RV travel. Refrigeration, lighting, ventilation, water pumping, device charging, and entertainment can together require about 2,500 Wh per day. Actual consumption varies with weather, occupancy, appliance efficiency, and travel habits. Use your measured daily usage and add a reserve of approximately 20–30% when selecting solar panels and battery storage.

Comparing Solar Panel Types, Sizes, and Mounting Options

Choosing a solar power system for an RV starts with comparing panel types, available space, and daily energy needs. Monocrystalline panels provide strong output in limited roof space. Polycrystalline panels often cost less but need more surface area. Flexible panels suit curved roofs and reduce wind resistance. However, some flexible models may age faster under constant heat. I learned this after measuring a hot RV roof instead of trusting specifications alone. Thin-film panels can perform steadily in partial shade, but their lower efficiency requires careful planning.

Measure the refrigerator, lights, fans, water pump, and charging devices. Multiply each wattage by its daily operating hours. A 200-watt array may support modest use, but cloudy weather changes the result. Match the array with suitable battery capacity and charge-controller limits. Leave extra capacity for unexpected demand. Do not rely on the panel label alone. A 100-watt panel rarely produces 100 watts all day. My first estimate ignored morning shadows. That mistake looked fine on paper.

Fixed roof mounts keep panels ready for use and allow airflow beneath them. Tilt mounts can improve winter production, but they need secure locking. Portable panels allow repositioning during the day. They also require safe storage and careful cable placement. Check roof strength, cable entry points, sealant, and maintenance access. Keep panels away from vents, air conditioners, and other shade sources. Even a narrow shadow can reduce output noticeably. A qualified technician should inspect uncertain roof structures.

Selecting Batteries, Charge Controllers, and Inverters

Choosing a solar system for an RV starts with the battery, not the panels. Estimate daily watt-hours from your refrigerator, lights, fans, and electronics. Then add roughly 20% for wiring losses and cloudy conditions. The U.S. Department of Energy’s 2023 Energy Storage Handbook reports typical lithium-ion round-trip efficiency near 85–95%. Lead-acid systems usually lose more usable capacity. Keep batteries ventilated, secured, and protected from extreme temperatures.

Match the charge controller to the array’s maximum voltage and current. A controller rated too closely may shut down during bright, cold mornings. Leave practical headroom. MPPT controllers generally harvest more energy when panel voltage exceeds battery voltage, especially under changing sunlight. NREL’s 2021 photovoltaic degradation study found a median module decline of about 0.5% annually, so modest oversizing can preserve useful output over time.

Size the inverter for continuous loads, then check surge power from compressors and pumps. NREL’s PVWatts documentation commonly models inverter efficiency at 96%, but real RV wiring can reduce delivered power. Use short, appropriately sized cables and install protection near the battery. My own mistake was trusting the inverter display without testing actual loads. Measure twice. A coffee maker may expose an undersized system quickly, while a quiet afternoon can hide the problem. Batteries should also provide enough reserve for several low-sun hours, not merely match one day’s average use.

10 Tips for Choosing a Solar Power System for RV - Selecting Batteries, Charge Controllers, and Inverters

# Decision Area Practical Guideline Suggested Specification or Calculation Why It Matters for an RV
1 Estimate Daily Energy Use List every appliance, its wattage, and the estimated hours of daily use. Daily energy (Wh) = appliance watts × operating hours. Add approximately 15–25% for wiring, conversion, and charging losses. A load estimate prevents the solar array and battery bank from being undersized for actual travel habits.
2 Choose a Suitable System Voltage Match the battery bank, controller, inverter, and DC loads to the same nominal voltage. 12 V systems suit smaller loads; 24 V or higher systems can reduce current in larger installations and long cable runs. Higher system voltage generally lowers cable current and can reduce voltage drop and conductor size.
3 Size the Solar Array Use realistic peak-sun-hour data for the locations and seasons in which the RV will travel. Approximate array size (W) = daily energy use (Wh) ÷ peak sun hours ÷ system efficiency. A practical planning efficiency is often 0.70–0.85. Clouds, shading, heat, panel angle, dirt, and controller losses can substantially reduce real-world production.
4 Select Battery Chemistry Compare usable capacity, weight, maintenance, temperature limits, and protection requirements. Lead-acid batteries are commonly planned around about 50% depth of discharge; many lithium iron phosphate systems permit approximately 80–90%, subject to the manufacturer’s limits. Usable capacity, not the printed amp-hour rating alone, determines how much energy is available between charges.
5 Calculate Battery Capacity Size the bank for the desired number of days without sufficient sunlight. Battery capacity (Ah) = required energy (Wh) ÷ system voltage ÷ allowable depth of discharge. Include inverter and wiring losses for AC loads. One to two days of autonomy is a common starting point, but the correct figure depends on weather, generator access, and travel style.
6 Match the Charge Controller Choose a controller compatible with the battery chemistry, system voltage, and solar-panel configuration. Controller output current should generally be at least array power ÷ battery charging voltage, with additional design margin. For example, 400 W ÷ 14.4 V ≈ 28 A before margin. An undersized controller may limit production or overheat, while incorrect charging settings can shorten battery life.
7 Choose PWM or MPPT Technology Consider panel voltage, available roof space, partial shading, and cable distance. PWM can be practical for simple, closely matched small systems. MPPT is generally better when panel voltage is higher than battery voltage or when conditions vary. MPPT controllers can convert excess panel voltage into additional charging current, especially in cooler conditions or with longer cable runs.
8 Size the Inverter Correctly Add the wattage of appliances that may run at the same time and account for startup surges. Continuous inverter rating should exceed the expected simultaneous load. Motors, compressors, and some power tools may require a higher surge rating for startup. A larger inverter is not automatically better because idle consumption and battery current also increase with size.
9 Check Installation and Safety Limits Verify roof load, ventilation, cable routing, fuses, disconnects, grounding, and battery-compartment requirements. Use overcurrent protection appropriate to each circuit and size cables for maximum current, length, allowable voltage drop, and insulation temperature rating. Correct protection and ventilation reduce the risk of overheating, fire, equipment damage, and unsafe battery conditions.
10 Plan for Monitoring and Expansion Select equipment with clear measurements for solar input, battery state, load consumption, and fault conditions. Leave reasonable capacity in the controller, inverter, wiring, and distribution equipment if future panels or batteries may be added. Monitoring reveals shading, declining capacity, unexpected loads, and charging problems before they become major failures.

Planning Installation, Wiring, Safety, and Weather Protection

10 Tips for Choosing a Solar Power System for RV

Planning should begin with your daily energy needs, not the largest panel available. Tip 1: List appliances, operating hours, and battery capacity. Tip 2: Leave space for cloudy-day production losses. Tip 3: Measure the roof before choosing panel sizes. Tip 4: Keep walkways, vents, and emergency access clear. A simple sketch helps. I once underestimated cable routes and lost useful storage space. That mistake still influences my planning.

Installation quality affects both performance and safety. Tip 5: Use a charge controller matched to the battery chemistry and panel output. Tip 6: Choose correctly sized cables for the distance and current. Tip 7: Add suitable fuses near the battery and solar input. Tip 8: Protect cables inside flexible conduit, especially near metal edges. Loose wiring becomes dangerous. Connections should be tight, insulated, and easy to inspect. A qualified RV electrician should review unfamiliar work.

Weather protection deserves equal attention. Tip 9: Select mounting hardware that resists vibration, rain, and repeated temperature changes. Tip 10: Seal roof penetrations with compatible, durable sealant, then inspect them regularly. Water can travel beneath fittings before stains appear. Use drip loops where practical, and keep connectors off the roof surface. Heavy snow, coastal air, and strong wind may require different mounting choices. My own system could use better labeling, which makes later troubleshooting slower than it should be.

Evaluating Costs, Maintenance, Expandability, and System Performance

Choosing a solar power system for an RV starts with honest energy measurements. Record refrigerator, lighting, ventilation, and charging loads for several days. A 400-watt array may produce roughly 1.2 to 2.0 kilowatt-hours daily, depending on location, season, shading, and panel angle. Use the National Renewable Energy Laboratory’s PVWatts tool before purchasing equipment. It provides location-based production estimates.

Costs extend beyond panel wattage. Include batteries, a charge controller, wiring, roof hardware, monitoring equipment, and installation labor. A cheaper system can become expensive when undersized batteries require frequent replacement. The U.S. Department of Energy recommends comparing lifetime energy costs, not only upfront prices.

That advice is easy to ignore. It should not be.

Maintenance is usually modest, but dust, bird residue, loose connections, and roof seal damage reduce reliability. Inspect cable glands after harsh travel. Clean panels with water and a soft brush when safe. IEA PVPS Task 13 reports that photovoltaic degradation commonly averages around 0.5% annually, although heat, humidity, and poor installation can accelerate losses. Design for expansion by leaving controller capacity, spare roof space, and accessible wiring routes. A modular battery bank also simplifies future upgrades. However, adding panels later may expose mismatched voltages and older batteries. Check compatibility first. Performance depends on sunlight, temperature, shading, battery health, and user habits, not panel labels alone.

Our story

When The Light Went On

The idea for Acrospire was formed in 2012 when founder Tim envisioned a different kind of lighting manufacturer: one that would not only deliver outstanding customer experiences but also prioritise fair treatment for its employees.

We’ve come a long way

Working from any nook and cranny we could find

Motivated by the belief the industry wanted and needed better, Tim shared his plan to establish his own venture with Hatty, who simply couldn't let him do it alone.

The rest, as they say, is history.

Protecting local jobs and ensuring the best quality possible.

The products sold should, where possible be manufactured here in the UK

Working from a rented office by day and assembling lanterns in a garage at night, Tim and Hatty set to work.

11 Years later

and a lot has changed

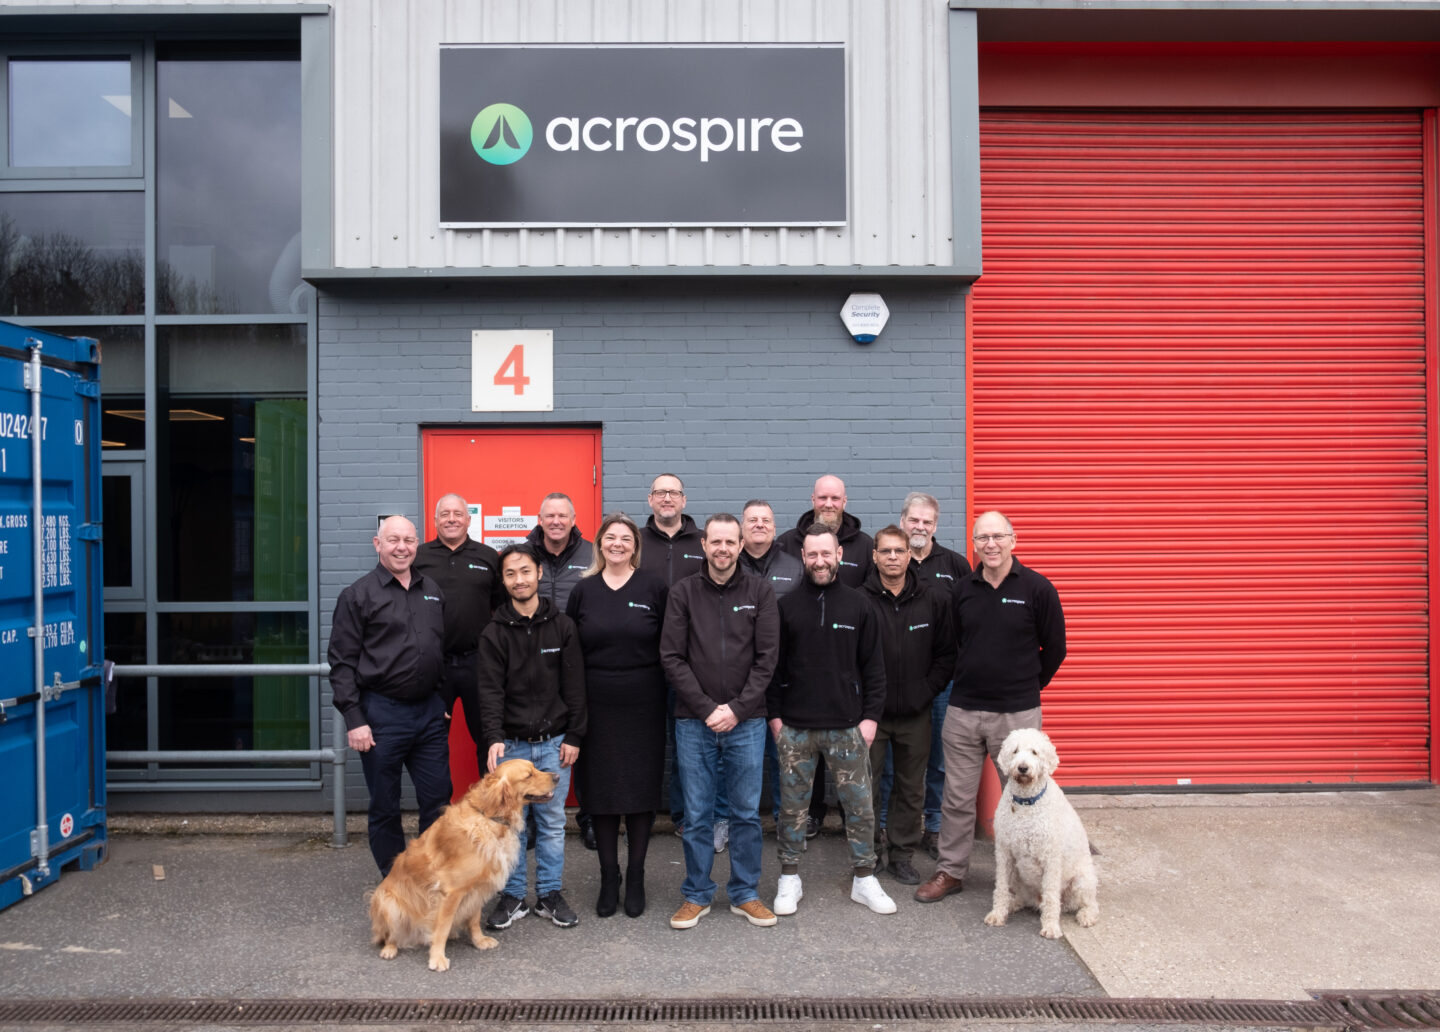
Acrospire now inhabits a 14000² ft manufacturing facility in Basingstoke, Hampshire. We’re a proud partner of the Made in Britain scheme, ISO9001 certified and a member of all relevant lighting industry trade bodies.

We've built a reputation to be proud of

Along with great relationships with our customers and a great team! We've attracted some of the most experienced members of the lighting industry, all by following one golden rule.

A simple ethos

Creating work to be proud of

That runs through all that we do. Customers who have made the switch to Acrospire have found working with us to be a breath of fresh air.

Market leading warranty

If you’re a professional in the lighting industry, you’re probably familiar with warranties that range from 3 to 10 years, with extensions available on special request or at additional cost. At Acrospire, where we’re proud to be different, we offer a market-leading simple 12-year warranty, as standard.

Tight Control on Quality

We focus on our customers not our competition. We manufacture our products in the UK: with the exception of our solar products, our supply chain is within a 60-mile radius of our factory in Basingstoke: to maintain greater control over quality. We al

Speed is key

Speed of response is crucial when it comes to resolving warranty issues. If we’ve made a mistake, we own it, get to the root cause, and fix it as quickly as possible. We believe in timely communication with our customers and making the resolution pro

Test and Test Again

We believe in independent testing and certification. Our new product development is in line with ISO 9001. Many of our products hold ENEC Certification. To meet the requirements of ENEC we also send random product samples for third party safety testi

Quality by design

Our product design is another key factor in our ability to offer a 12-year warranty. We value engineer rather than cost cut, never compromising on quality. We stick to our processes and engage with our supply chain to ensure that every product meets