10 Parking Lot Lighting Tips for Global Buyers
For global buyers, parking lot lighting is more than a fixture purchase. It affects safety, energy costs, maintenance schedules, and customer confidence. A poorly lit entrance can feel unsafe, even when the measured illumination appears acceptable. A bright pole does not guarantee a useful lighting design.
The U.S. Department of Energy reports that LED technology can use at least 75% less energy and last up to 25 times longer than incandescent lighting. These figures are useful benchmarks, but they do not describe every parking application. Savings depend on mounting height, operating hours, optics, controls, and local electricity prices. The International Energy Agency’s Energy Efficiency 2023 report also identifies efficient lighting and controls as practical tools for reducing electricity demand. For buyers, that means comparing complete systems, not only wattage.
Look beyond the catalog image. Check photometric files, glare control, color temperature, surge protection, IP and IK ratings, corrosion resistance, and warranty terms. Ask whether the supplier has tested the fixture under heat, rain, dust, and voltage variation. A coastal site may need stronger corrosion protection than an inland warehouse. Motion sensors can reduce nighttime consumption, yet poor programming may create dark zones or frequent switching. This guide presents ten practical parking lot lighting tips for global purchasing decisions. Some recommendations may need adjustment. Real sites are rarely perfect, and even experienced teams can overlook tree growth, camera visibility, or future expansion. Careful measurement, independent verification, and clear documentation remain essential.

Define Lighting Goals Based on Parking Lot Size and Usage
A parking lot lighting plan should begin with its purpose, not with fixture quantity. A small retail lot may need clear entry visibility and comfortable lighting near doors. A large transport lot needs wider coverage, stronger wayfinding, and dependable visibility between parked vehicles. Measure the site carefully. Record driving lanes, pedestrian routes, entrances, loading areas, and obstacles such as trees or signs.
Usage changes the lighting goal. A busy hospital lot may operate all night, while an office lot may empty after sunset. Retail sites often experience short periods of intense activity. Choose controls that support lower output during quiet hours, without creating sudden dark zones. Photometric calculations can reveal weak areas that a daytime inspection misses. Walk the property after dark. Real conditions matter.
Light uniformity deserves more attention than maximum brightness. Excessive glare can make faces, signs, and moving vehicles harder to see. Mounting height, beam distribution, and spacing must work together. Consider rain, dust, snow, and cleaning access when selecting equipment. Maintenance planning is part of the original design, not an afterthought. A first plan is rarely perfect. Review it after installation. Compare measured results with driver and pedestrian feedback, then adjust carefully. Some buyers focus only on wattage and purchase price. That approach can overlook comfort, visibility, and long-term operating effort.
Choose Suitable Fixtures, Mounting Heights, and Beam Angles
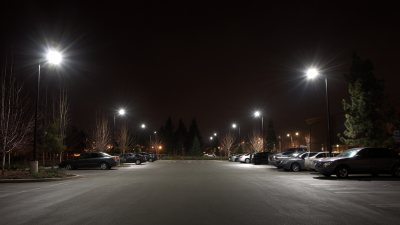
For global buyers, parking lot lighting begins with the site, not the catalog. Walk the pavement after sunset and note dark zones, trees, signs, and nearby buildings. Choose outdoor fixtures with suitable weather resistance, efficient optics, and easy maintenance access. A bright fixture is not always a better fixture. Excessive brightness can create glare for drivers and pedestrians.
Mounting height strongly affects coverage and comfort. Poles around 6 to 10 meters often suit medium parking areas, but local layouts may require adjustment. Higher poles cover wider spaces with fewer fixtures. Lower poles can improve uniformity around entrances and walkways. Keep fixtures clear of branches and signs. Measure the shadows. Do not guess.
Beam angle should match the parking lot geometry. Wide beams can reduce dark gaps between poles, while narrower beams help reach distant pavement. Use asymmetric optics near boundaries to limit unwanted light beyond the property. I once focused too heavily on average illumination and overlooked a dim pedestrian route. The readings looked acceptable. The experience was not. Review uniformity, glare, color appearance, and maintenance access together. Before final approval, test one representative area at night and compare the result with the lighting plan. Fixture spacing may need revision. That is normal. Local climate, pole loading, electrical standards, and site regulations also deserve professional review before installation.
10 Parking Lot Lighting Tips for Global Buyers - Choose Suitable Fixtures, Mounting Heights, and Beam Angles
| No. | Lighting Tip | Typical Planning Range | Recommended Fixture / Optical Choice | Buyer Checklist | Main Benefit |
|---|---|---|---|---|---|
| 1 | Define the required illuminance | Approximately 5–20 lux average horizontal illuminance for many outdoor parking areas; higher values may be required for high-activity, retail, pedestrian, or security-sensitive sites. | Use a photometric layout based on the site classification instead of selecting fixtures by wattage alone. | Confirm the applicable local code, road-lighting standard, security requirements, and maintained rather than initial illuminance. | Prevents over-lighting, under-lighting, and unnecessary energy use. |
| 2 | Select an appropriate mounting height | About 6–9 m for small or medium parking areas; approximately 9–15 m for larger lots where wider coverage is needed. | Use lower poles for pedestrian-scale areas and higher poles with controlled optics for large open lots. | Check pole foundation design, wind loading, maintenance access, nearby trees, and surrounding building heights. | Balances coverage, glare, pole quantity, and installation cost. |
| 3 | Match beam angle to pole spacing | Narrow beams around 20°–40° for long throw; medium beams around 40°–70°; wide beams above 70° for broad, close-range coverage. | Choose asymmetric parking-lot optics for perimeter or roadway coverage and symmetric optics for centrally located poles. | Review IES/LDT photometric files, aiming angles, pole spacing, and spill-light boundaries. | Improves uniformity and reduces dark zones between poles. |
| 4 | Control uniformity, not just average lux | A practical design target is often a maintained minimum-to-average uniformity of approximately 0.25–0.40, subject to local requirements. | Use overlapping distributions and carefully positioned poles rather than relying on higher lumen output. | Request a calculation grid showing average, minimum, maximum, and uniformity values. | Supports visual comfort, safer movement, and better camera visibility. |
| 5 | Choose a suitable color temperature | Approximately 3000–4000 K is commonly suitable for parking areas; 5000 K may be specified where a cooler appearance is required. | Use warmer light near homes, wildlife-sensitive areas, and dark-sky zones; use neutral white where visual recognition is a priority. | Check local regulations, community requirements, environmental restrictions, and consistent CCT across the site. | Reduces complaints while maintaining useful visibility. |
| 6 | Specify adequate color rendering | CRI 70 or higher is commonly used outdoors; CRI 80 or higher can improve the recognition of people, vehicles, and surface colors. | Select a stable LED light source with documented color consistency and suitable R9 performance where facial or red-color recognition matters. | Verify CRI, color tolerance, lumen maintenance, and test documentation. | Enhances security perception and visual identification. |
| 7 | Prioritize glare and spill-light control | Use full-cutoff or well-shielded distributions where light trespass, disability glare, or dark-sky concerns exist. | Choose visors, shields, backlight control, and precise tilt adjustment for site boundaries and nearby residences. | Evaluate glare rating, vertical illuminance, upward light, and light levels at property lines. | Improves comfort and regulatory compliance. |
| 8 | Check ingress and impact protection | IP65 is a common minimum reference for dust and water protection; IP66 offers stronger protection against powerful water jets. IK08–IK10 may be considered where impact risk is elevated. | Use sealed housings, corrosion-resistant finishes, and impact-resistant lenses appropriate to the site environment. | Confirm the exact IP and IK test standards, salt-spray needs, operating temperature, and drainage design. | Extends service life in rain, dust, coastal air, and high-traffic locations. |
| 9 | Plan controls and dimming schedules | Common control options include photocells, time schedules, motion sensors, and dimming levels such as 30%–70% during low-use periods. | Use programmable drivers with 0–10 V or DALI compatibility when centralized or zone-based control is required. | Confirm control protocol, standby behavior, sensor coverage, surge protection, and local wireless regulations. | Reduces energy consumption and operating hours. |
| 10 | Verify electrical and maintenance requirements | Typical outdoor systems may use 100–277 V AC or 220–240 V AC, depending on the region; surge protection of 6–10 kV is often considered for exposed installations. | Specify the correct input range, frequency, driver temperature rating, replaceable components, and maintenance factor. | Check regional voltage, certification requirements, earthing, surge protection, warranty terms, and access for cleaning or replacement. | Improves reliability, compatibility, and total cost of ownership. |
Note: The ranges shown are general planning references. Final fixture selection and spacing should be confirmed through a site-specific photometric calculation and the standards applicable in the installation country.
Plan Light Levels, Uniformity, and Glare Control
Parking lot lighting should begin with a measurable plan, not fixture quantity. Define target illuminance in lux, then check uniformity across driving lanes, pedestrian routes, and parking spaces. A bright entrance cannot compensate for dark corners. For many sites, a lighting simulation helps reveal these gaps before installation. Verify the results with on-site readings after dark. Weather, dust, and aging lenses can reduce output over time.
Tip 1: Set light levels by task and risk. Vehicle lanes may need different levels from walkways or loading areas. Review local regulations, safety expectations, and environmental limits before selecting equipment. Global buyers should request photometric files using recognized formats. Ask for maintenance factors, not only initial lumen values. Small details matter.
Tip 2: Control glare from the driver’s viewpoint. Mounting height, aiming angle, shielding, and pole spacing all affect visual comfort. A fixture can meet average lux targets and still create harsh bright spots. Test viewpoints near entrances, ramps, and neighboring homes. Use dimming during low-traffic hours when permitted. This saves energy, though poorly adjusted controls may reduce perceived security. That needs review.
Tip 3: Inspect uniformity, not just brightness. Walk the site with a calibrated meter and compare readings against the design. Look beneath trees, beside parked vehicles, and near boundary walls. Keep records with dates and weather conditions. Real sites rarely match perfect models. That is normal, but unexplained dark areas should not be accepted.
Improve Energy Efficiency with LEDs and Smart Controls
Parking lot lighting performs best when energy planning begins with a nighttime site audit. Walk the property after dark, and record dark corners, glare, pole spacing, and pavement use. LEDs can reduce electricity demand, but wattage alone proves nothing. Compare delivered lumens, optical distribution, and maintained light levels. Choose optics that place light on driving lanes, not neighboring windows or empty landscaping. Moderate color temperature often supports visibility without creating harsh, bluish glare. Use durable housings rated for rain, dust, vibration, and seasonal temperature changes. Check mounting height and aiming before ordering fixtures. A small aiming error can create bright patches and unsafe gaps. Measure twice.
Smart controls make savings more practical when they match real traffic patterns. Photocells can switch lights at dusk, while astronomical schedules can prevent unnecessary daytime operation. Motion sensors may raise output when vehicles or pedestrians approach. Set gentle dimming levels, because sudden changes can distract drivers. Divide the lot into zones near entrances, loading areas, sidewalks, and remote spaces. Review occupancy data monthly, then adjust schedules instead of trusting factory settings. Commission every sensor during an actual evening walkthrough. Maintenance teams should clean lenses, inspect wiring, and compare energy reports with earlier months. Keep emergency and accessibility needs in the control plan. Controls are not magic. Poor calibration wastes energy and frustrates users. A pilot zone can reveal these problems before a full installation. Document readings, complaints, weather conditions, and corrective work for reliable decisions.
Parking Lot Lighting Energy Efficiency: LEDs and Smart Controls
For a 100-fixture parking lot operating 12 hours per day, replacing 100 W HID fixtures with 60 W LED fixtures reduces calculated annual electricity use from 43,800 kWh to 26,280 kWh. Adding smart controls that reduce operating time by 30% lowers annual use to approximately 18,396 kWh.
Calculations assume 365 operating days per year and exclude ballast, maintenance, and installation costs. Actual savings vary according to fixture wattage, operating schedules, occupancy, and control settings.
Verify Safety, Compliance, Maintenance, and Total Costs
10 Parking Lot Lighting Tips for Global Buyers
Verify safety before comparing prices. Check pole stability, grounding, cable protection, and emergency access routes. Light should cover walking paths, payment areas, ramps, and vehicle turns without creating harsh glare. Ask for a photometric layout, not only a brightness number. Uniform illumination matters more than a bright spot beneath each fixture. Inspect the proposed color temperature, flicker performance, surge protection, and wind rating. Small details can affect driver comfort and camera visibility.
Compliance requires local review. Confirm electrical codes, planning permits, environmental limits, and accessibility requirements with a qualified local professional. Standards differ between countries and sometimes between cities. Request test reports that match the supplied configuration. A generic certificate may not prove actual site performance. Keep installation records, circuit diagrams, and inspection dates. They save time when ownership changes.
Maintenance should be measured in labor, not just lamp life. Check cleaning access, replacement methods, spare-part availability, and remote fault alerts. Include lift rental, technician travel, electricity, disposal, and downtime in the total-cost model. A cheaper fixture may need more frequent cleaning near dust, salt, or heavy traffic. That calculation is often missed. Also review warranty exclusions and response times. No plan is perfect; drainage, shadows, or future tree growth can still change performance. Walk the site at night after installation, record weak areas, and adjust the design before accepting the project.
Related Posts
-
Understanding the Different Types of Parking Lot Lighting Solutions
-
What are the Benefits of Effective Parking Lot Lighting
-
Top Strategies for Enhancing Safety with Best Parking Lot Lighting Solutions
-
Innovative Parking Lot Lighting Solutions for Enhanced Safety and Energy Efficiency
-
Challenges Faced by Global Buyers When Sourcing Wall Lights from Manufacturers
-

How to Choose the Best Street Lights for Your Needs?