How to Choose Street Lights in 2026
Choosing street lights in 2026 means balancing visibility, energy use, comfort, and maintenance—not simply buying the brightest fixture. A road that looks evenly lit on a product sheet may have dark gaps beside trees, parked vehicles, or intersections. Start with the site. Note road width, walking and cycling routes, pole locations, nearby homes, and operating hours.
Compare lighting plans, not just wattage or advertised lumen output. Ask suppliers for photometric layouts showing how light reaches the pavement and where shadows may fall. Check fixture optics, mounting height, glare control, and color temperature against the setting. A calm residential street may need a different approach from a busy junction. LED efficiency matters, but so do driver quality, replaceable components, warranty terms, and access for repairs. Controls such as dimming can reduce energy use during quieter hours, when the design and local requirements allow it.
Think beyond installation day. Request clear documentation, realistic maintenance estimates, and performance data for the proposed system. Confirm that the design considers pedestrians, cyclists, weather, and light spilling into nearby windows. A technically sound plan can still feel uncomfortable at night. Take a nighttime walk, if possible, and look for glare, uneven patches, and confusing transitions between bright and dim areas. That check may change your mind. No checklist replaces local experience, and not every trade-off has a neat answer. This guide explains how to assess street lights with practical questions, so your final choice fits the place—not just the catalogue.
Identify the Lighting Needs and Conditions of the Street
How to Choose Street Lights in 2026
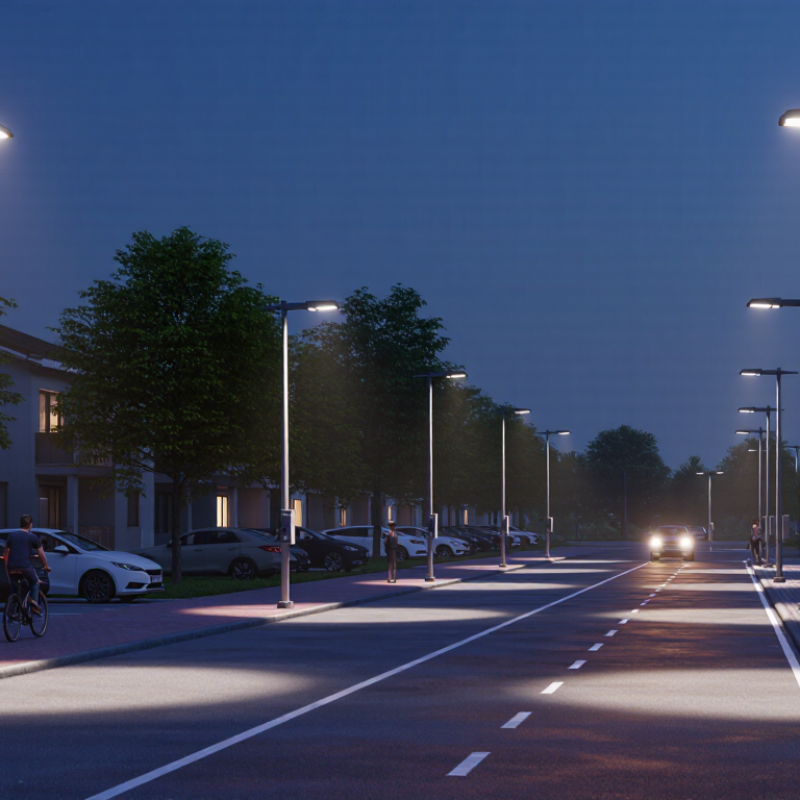
Identify the street’s real needs before comparing fixtures. Walk the site after dark, then revisit during daylight. Note vehicle speeds, crossing points, bus stops, parked cars, and routes people actually use. A narrow residential road needs different light distribution from a busy junction. Check existing pole positions, tree canopies, building shadows, and wet pavement. Small details matter.
The IES Recommended Practice for Roadway Lighting, RP-8-22, bases lighting criteria on roadway and pedestrian conditions, rather than one universal level. NHTSA’s 2022 Traffic Safety Facts: Pedestrians reports that about 76% of pedestrian fatalities occurred in dark conditions. That statistic does not prove lighting alone prevents crashes, but it shows why nighttime visibility deserves careful attention. Consider uniformity, glare, and whether people can see faces at crossings. One inspection may miss seasonal shadows; note uncertainty and verify it later.
Tips: Photograph key locations after dark. Record existing light levels and problem areas, such as a dim curb ramp or a bright, uncomfortable hotspot. Ask nearby users where visibility feels poor. Then compare proposed lighting against the site’s actual use, not just a typical street profile.
Compare Street Light Types, Optics, and Light Sources
Street-light selection starts with the road, not the fixture catalogue.
Type II optics suit narrow streets; Type III spreads light across broader roads, while Type IV pushes it toward edges and sidewalks. Type V distributes light around the pole, often for intersections or open areas.
Ask for an IES photometric file and check the actual spacing, mounting height, pavement, and target uniformity. A tidy beam diagram can still hide dark patches between poles. Glare is real.
Light source matters, too. High-pressure sodium has a warm, amber appearance, but LED systems offer more control over spectrum, dimming, and distribution. The U.S. Department of Energy’s 2017 report, Adoption of LED Street Lighting in the United States, describes energy savings commonly around 50–70% when LEDs replace conventional streetlights. Treat that as a reference, not a guarantee: savings depend on existing wattage, operating hours, and dimming settings.
Specify measured input power and delivered lumens, rather than relying on source efficacy alone. For residential blocks, review color temperature and shielding; bright white light can feel harsh outside bedroom windows.
One detail is easy to overlook: a lower-energy fixture may still be poorly aimed. Check a nighttime sample installation before ordering at scale.
Evaluate Brightness, Energy Use, and Smart Controls
Street lights in 2026 should match the place they serve, not just look bright on a product sheet.
Start by identifying the task: lighting a road, crossing, path, or parking area. Compare delivered light and distribution, not wattage alone. A photometric plan can show whether light reaches the pavement evenly and avoids spilling into nearby homes.
Measure first.
Excess brightness can cause glare and waste energy, while too little light can leave dark gaps.
Tips:
Compare expected light output with energy use, and ask how the estimate was calculated. Check pole spacing and mounting height against the site plan. Where possible, review the area after dark; wet pavement and tree cover can change what you see.
Test after dark.
Smart controls can reduce energy use when they are configured for real conditions.
Scheduling can lower output late at night, while motion-based increases may suit quieter paths. Ask how settings are commissioned, who can adjust them, and what happens if connectivity fails. Choose controls with a practical fallback, such as a preset dimming schedule. Keep the settings simple enough to maintain. A detailed spreadsheet helps, but it cannot replace an on-site check; I would leave room to revise settings after installation.
Check Safety Standards, Environmental Impact, and Local Rules
Choosing street lights in 2026 starts with safety, not brightness alone. Check which electrical and lighting standards apply locally, and ask for test reports and clear product specifications. Make sure poles, wiring, and fixtures suit local wind, rain, salt, or freeze-thaw conditions. Glare matters. A bright road can still hide a pedestrian if light shines into drivers’ eyes. Review beam direction and light uniformity near crossings, bus stops, and bends. If possible, inspect a sample at night; catalog images rarely show the full effect.
Consider what the light does beyond the road. Shielded fixtures can reduce light spilling into homes and nearby habitats, while well-chosen color temperature may limit harsh blue-rich light. Dimming schedules and motion controls can save energy where traffic is quiet, but only if visibility remains safe. Efficiency is not the whole story. Check municipal plans, permit requirements, pole-height limits, and any local rules on operating hours or light spill. Requirements vary, so confirm them with the relevant local authority before ordering. It is an easy step to overlook.
Tips: Compare measured light output, not wattage alone. Walk the site after dark, note dark patches and glare, and record any changes needed. A small adjustment can help. Recheck the plan with a qualified lighting professional before installation.
Compare Costs and Plan Installation and Maintenance
Compare street lights by installed cost, not fixture price alone. Include poles, foundations, wiring, trenching, controls, labor, and traffic management. A low-cost unit can become expensive when a site needs deep excavation or custom mounting. Check light output, distribution, and energy use together; watts alone do not show how evenly a road will be lit. Ask contractors to state assumptions, such as pole spacing and operating hours. Small details change the estimate.
Plan installation around the actual site. Walk the route after dark and note crossings, trees, driveways, and poorly lit corners. Confirm underground services before digging, and schedule work to limit access disruptions. For maintenance, compare expected driver and lamp life, replacement-part availability, lift-truck access, and inspection labor. Keep a record of outages and repairs. It helps reveal patterns, though the first year may not predict every future cost.
Tips: Request comparable bids using the same lighting levels and operating schedule. Check one sample location at night before approving a full layout. Leave room in the budget for unexpected ground conditions; estimates can miss them. Don’t choose on purchase price alone.